This post is sponsored by The Home Depot. See full disclosure below regarding DIH Workshop.*
I’m super excited to share my version of the June 2016 DIH Workshop project today! This DIY Drink Station far exceeded my ideas and I couldn’t be happier as to how it turned out.
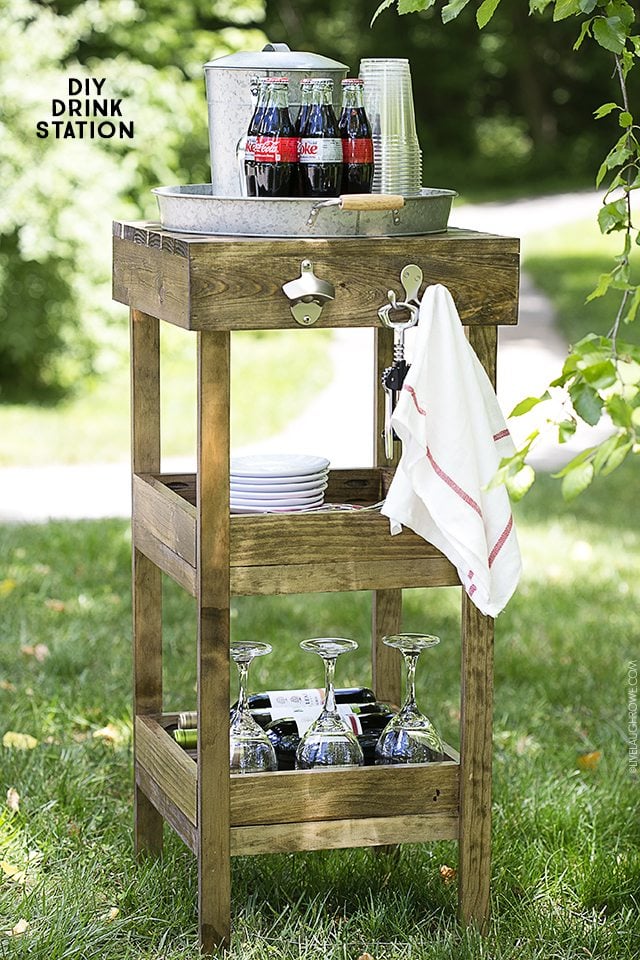
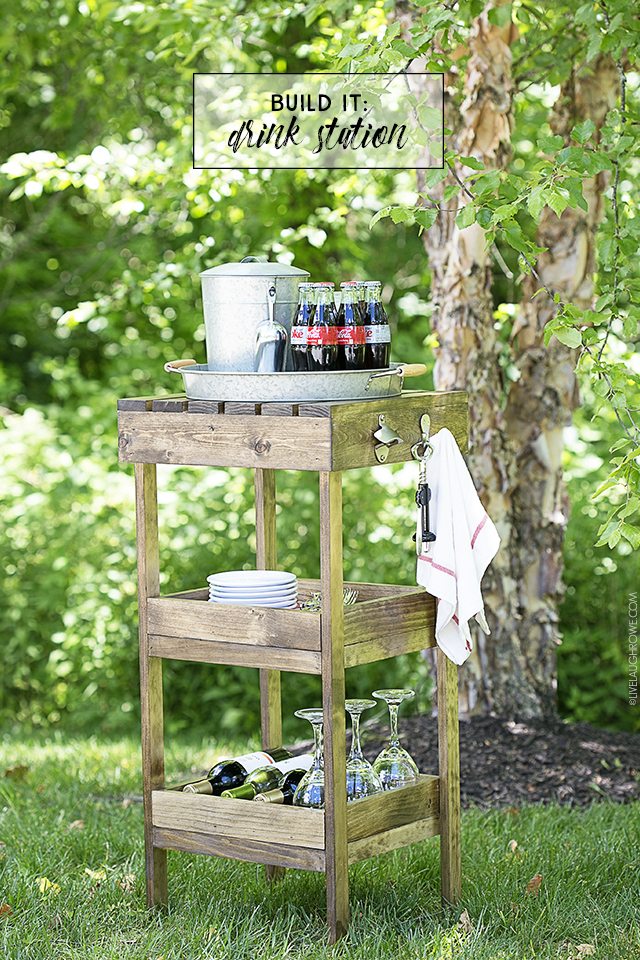 DIY Drink Station

If you like to entertain (whether indoor or outdoor), a piece like this is essential! Be sure to read the entire post, because there is a feature of this drink station that is my absolute FAVE. No cheating by scrolling to the end of the post — hee hee! Mmmmkay? Before we get to that, let’s take a look at how you can build one of these beauties for yourself!
Supplies for DIY Drink Station
Wood:
(2) 1x2x6
(1) 1x2x10
(3) 1x3x10
(1) 1x4x6
Tools:
Drill
Kreg
Miter Saw
Hammer
Nail Gun
Wood Glue
Screws (for added support)
Cuts:
Using the two 1 x 2 x 6, cut four 36” length pieces for the legs.
Using the 1 x 2 x 10, cut the following pieces:
-Four 14 ½ ” pieces for the side leg braces
-Two 14 ½” pieces for the back leg braces and shelf stop.
-Two 14 ½” pieces for the front leg braces
Using two of the 1 x 3 x 10, cut the following pieces for two boxes that make up the shelving:
-Four 14 ½” pieces for two sides
-Four 13” pieces for the other two sides
-Eight 13” pieces for the bottom slats
Using the third 1 x 3 x 10, cut the following for the top shelf slats:
-Six 16 ¾” pieces
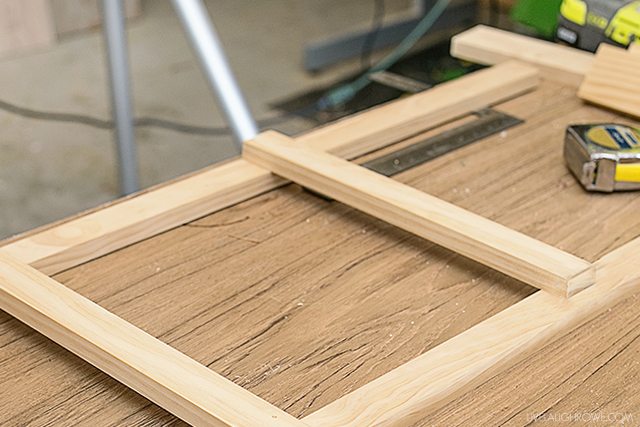
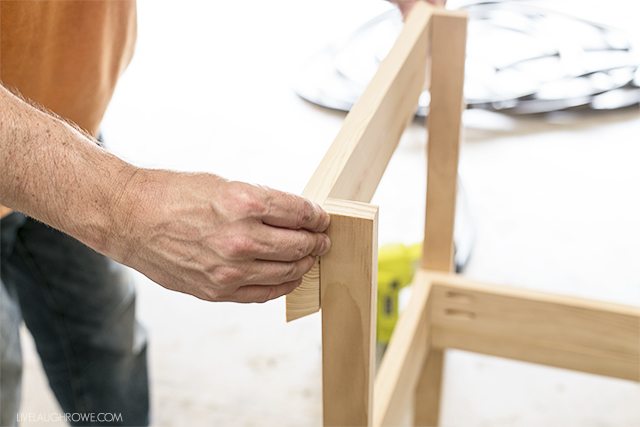
Leg Assembly:
Assemble the legs by laying two 36” pieces of wood (2” side down) parallel with each other 15 1/4 “ apart from the outer edge and attach the 14 ½” side brace where the top of the brace comes 7 ½ “ from the bottom of the leg. Attach flush on one side and come in ¾” on the other. Continue to attach the second side brace where the top of the brace comes 20 ¾” from the bottom. Attach flush on same side as first brace and come in ¾” on the other. Repeat for the other pair of legs.
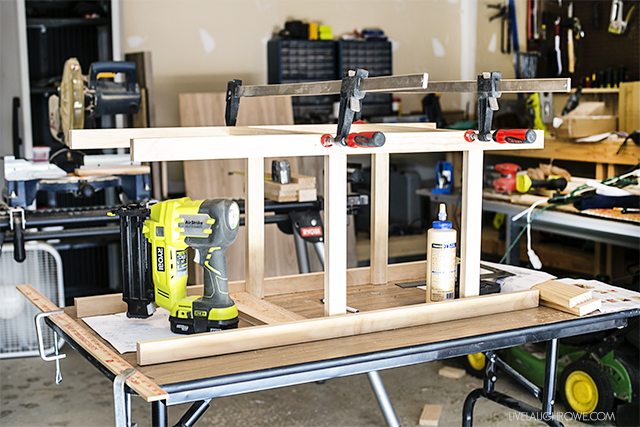
 Stand (or lay) the two leg portions parallel to each other and attach a 14 ½” back brace to the inside of the legs resting on top of the side brace that is flush to the legs. Repeat for the other brace.
Attach a 14 ½” brace on the front where the side brace is ¾” in. This brace will be flush to the front of the stand. Use clamps to allow wood glue to dry for extra support.
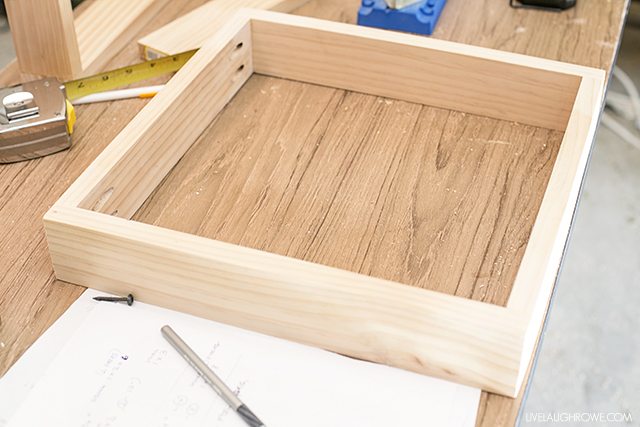
 Shelf Box Assembly:
Attach the two 14 ½” with the two 13” pieces to make a 14 ½” x 14 ½” square. Repeat to make the second box.
 Attach the four 13” slats to the bottom to using a Kreg joint to complete the shelf box. Repeat for the second shelf box.
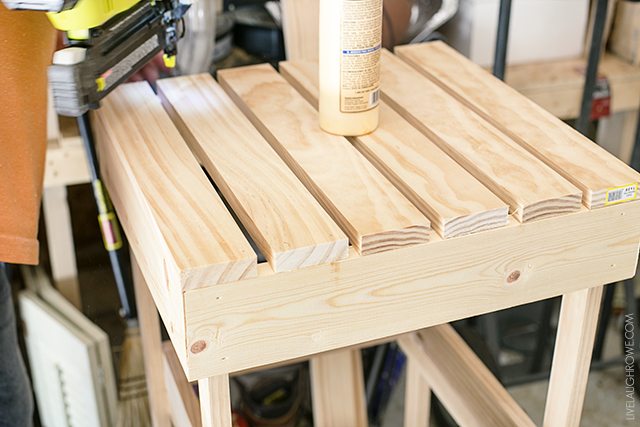
 Top Assembly:
Build the top box by cutting four 16 ¾” mitered corner pieces from the 1 x 4 board. You can either build the box and attach it to the legs or attach one piece at a time working around the legs.
Cut six 16 ¾“ pieces of 1 x 3 to form the top shelf. Space evenly apart.
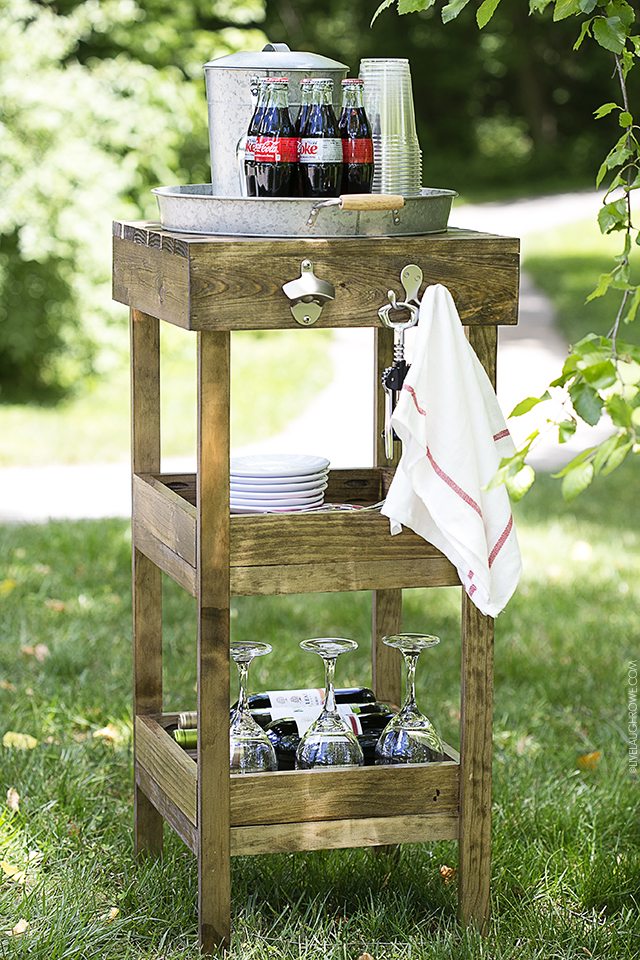
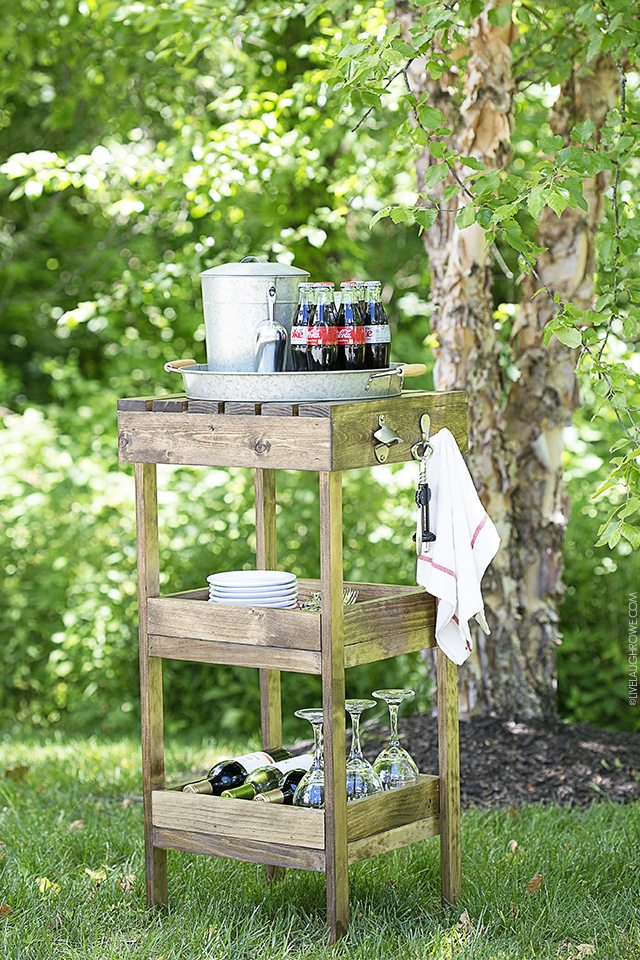
 Once you’re done — you can paint or stain the drink station! I chose to stain mine using Minwax Real Walnut and used Minwax Indoor/Outdoor Helsman Spar Urethane to seal it. The other option to save you some time is to use a deck stain.
Add a hook or bottle opener
for functionality.
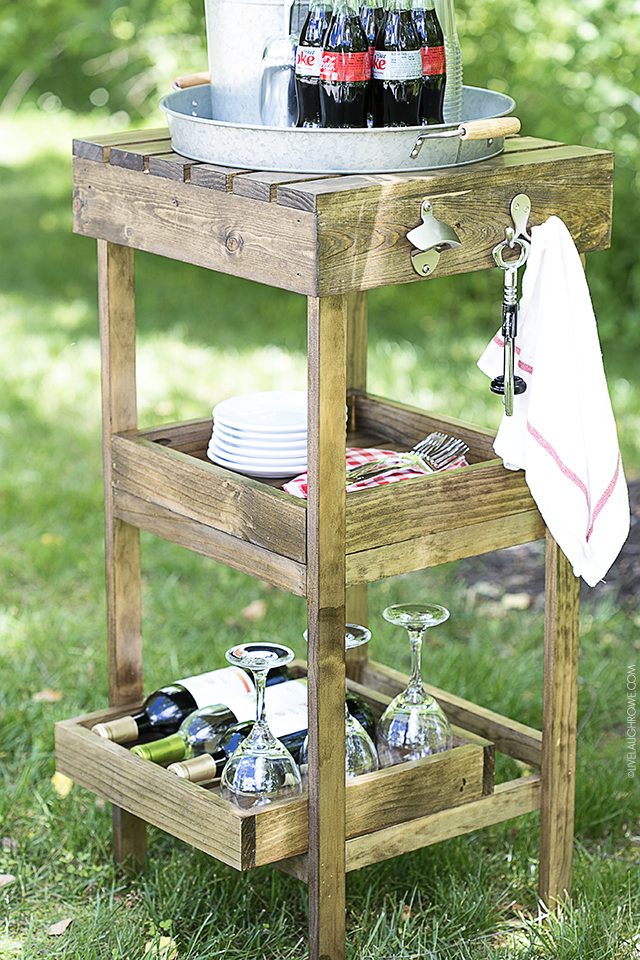
I added a hook and bottle opener to the side of mine as well. Both seemed essential. Where there are drinks, there will be messes, right? So having a towel handy seemed necessary (wink).
I think it turned out fabulous! Want to know one of my favorite features? If you scroll down a couple of pictures, you’ll notice that the shelves are REMOVABLE! They can be removed and used as serving trays too. Eeeeek! Isn’t that awesome sauce?!?
 How cute is my little helper? Leo (and his mom) were both a HUGE help for this photo shoot!
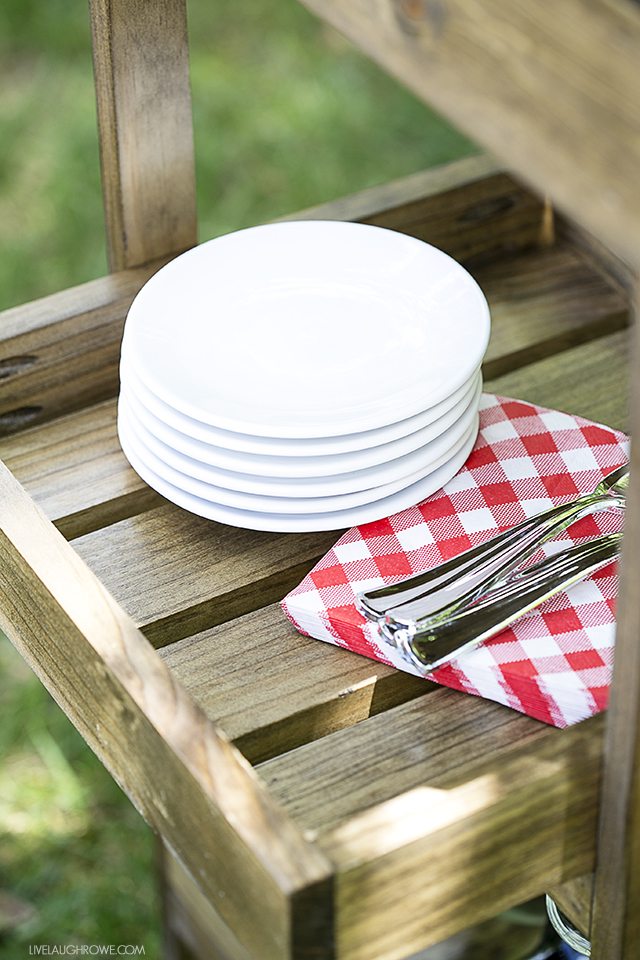
 Below you can see the shelf is pulled out. Isn’t that a great feature? Place a few appetizers on one and use it to serve your guests.
 Being this is a virtual par-tay, each of the DIH Bloggers asked four friends to join us! Here is what my team put together (and a BIG thanks to Ashley, Katie, Shannon and Sara for joining me):
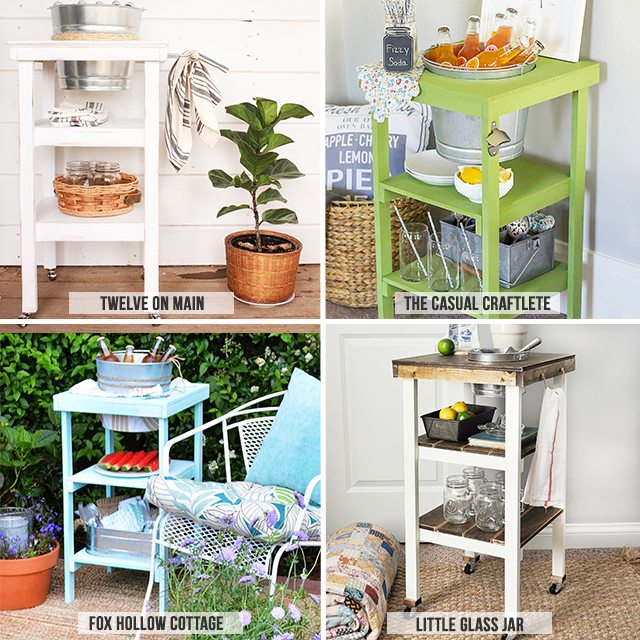
Twelve On Main | The Casual Craftlete Blog
Fox Hollow Cottage |Little Glass Jar
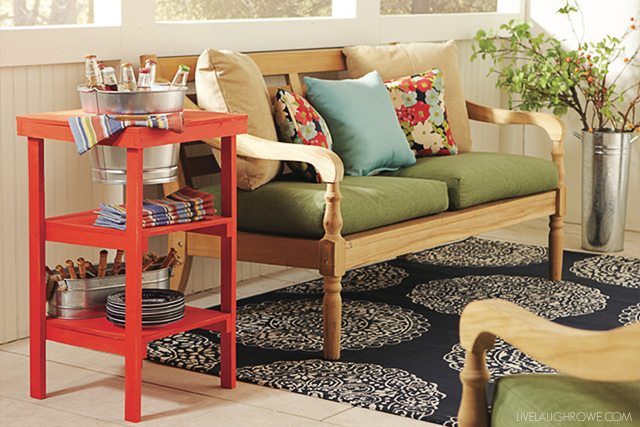
Here’s the original DIH project, which inspired mine:
 That’s it! I hope you’re feeling inspired to build your own DIY Drink Station. Be sure to Save the Date for this Thursday, June 16th at 6:30 p.m. Sign up to join your local Home Depot!
 Be sure to visit with me here too:
Facebook | Instagram | Pinterest | Twitter |Google+


Shannon Fox says
LOVE your customized cutie!!
I’ll be over for a Coke in 5 😉
Jenn says
I love this!! And I love that you can slide out the shelves!! So brilliant!
Kelly Rowe says
Thanks Jen. 🙂 Appreciate it. Yeah, the removable shelves are pretty great…makes it that much more functional. Have a GREAT Monday! xo.
Nancy @ Artsy Chicks Rule says
Love the rustic look you gave yours!!!
Kelly Rowe says
Thanks so much Nancy! 🙂 Happy Monday! HUGS!
heather burningham says
Totally crushing on the slat crates you added!!
Kelly Rowe says
Thanks Heather. I appreciate it. I love that they can be removed. 🙂 Have a great day. xo.
Kara says
I love how yours turned out, and I can’t wait to see the rest of them!
Little Glass Jar - Ashley Broviak says
Seriously, your cart is just awesome! I love the stained wood look too, of course! XO!
Kelly Rowe says
Thanks Ashley! I appreciate it. Yours looks great too!! So, glad you get to be apart of the fun DIY projects this year. 🙂 HUGS FRIEND.
Lydia Nordhoff says
I absolutely love this Kelly! You’ve inspired me to do my first workshop!
Kelly Rowe says
Thank you soooo much, Lydia! I’m super excited to hear you’ll be attending your first workshop too. HUGS!!
Sharon aka Mom says
Absolutely love this and the best part is I got to see it close and upfront?! When do you start taking orders?.
Kelly Rowe says
LOL. Thanks Mom! I’ll see what I can do. 🙂 xo.
mary says
I love the addition of the opener and hook, as well as the pull out shelf! I am headed to my Home Depot tonight to make one of these for myself!
Liz says
What a fun project!! Perfect for summer entertaining. So much better than the tacky cooler we usually drag out!
Brenda @ a farmgirl's dabbles says
I love functional, simple pieces like this. Great tutorial for anybody to make!
Sara says
This is so darling, Kelly! What a wonderful idea for summer!
Lana@NeverEnoughThyme says
Love, love, LOVE this project! I printed it out and am handing it to hubby when we walks in the door this afternoon 🙂
Kelly Rowe says
Thanks so much Lana! Appreciate it. I’m sure your husband will enjoy building it and you will enjoy having it around. HUGS!
Lou says
my kids are obsessed with having their own drinks station to serve friends especially at Christmas time – this is fantastic and super smart- I will be reading more of your beautiful blog now I have found it! Lou
Kelly Rowe says
Thanks so much Lou! Appreciate you stopping by. …and Welcome! It’s always nice to have new readers. 🙂 Have a wonderful evening. HUGS.
Shannon says
Has anyone made this? I know it’s 4 years old but I just made it and I feel like something is wrong in the instructions with the shelf supports when building the legs. Does each pair of legs need the flush side on the opposite?